Monday 28 April 2014

New tack in Encaustic, see where it takes me

I needed to find myself a subject to satisfy in this here Encaustic Adventure ................
Maybe this is it:

Chairs

and my first try, simply named: First Chair
sketched, drawn and encaustic'd chair
layered, overdrawn
your basic all use wooden chair
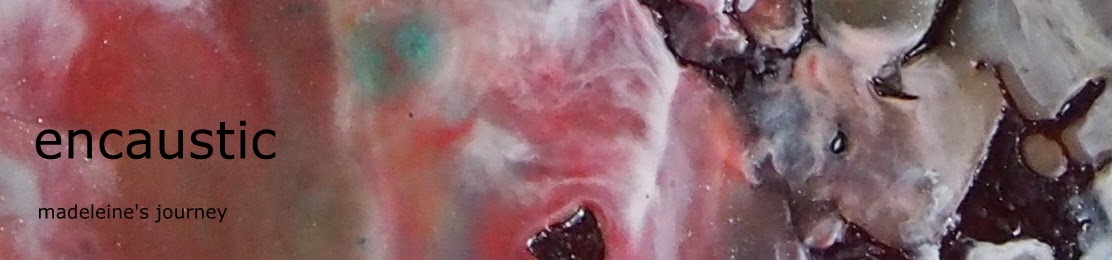
PS: colours look much better in real light, I have trouble making photos of the Encaustic works (with an Olympus OM-D), they do not transfer the blue colours as they are, maybe the wax layers change it?

Sunday 27 April 2014

Eco dyed Prefelt in Encaustic

Was interested on the outcome of this leftover piece from my Eco dyed Pre-felt and some of the wool strands imbedded in Encaustic

I want to do something with it, but haven't worked out what yet so I just keep in visual contact until it occurs

(What is Eco Dyed? you can click on my Textile Blog to find out)

Monday 21 April 2014

Finished Encaustic Poppy

I will be taking photos to see if and how much the Encaustic Medium dry's clear


It is autumn here, so the temperatures were 16 - 18o daytime and dropped to 5o at night

be interesting

PS: 2 day painting was polished before photo


Sunday 20 April 2014

It wasn't meant to be easy, was it?

Phooooooooooooo.........., this is more difficult than watercolour

I have spent the last few weeks painting with Encaustic only to reject all, redo, over paint, melt and repaint. Most were not worth taking photos of, some are just turned against the wall for the moment....


here is a collage of the "Poppy" story
first issue was that this is a 60 x 80 x 2.1 cm board, and let me tell you, beware of going big, it changes enormously the way you can work in many ways
How much EM you need, how long the warmth keeps in the working container and simply just the surface to work on
My working space is restricted, and that did not help either

whatever I tried to achieve ended as visually not satisfying

by the way, the top middle photo, I think some of the wax mixed with the clay, hence the discolouring (I first thought it was not dry, and waited and waited, but it stayed this way)


Now I am waiting for a bit of light, so I can take a photo of, hopefully, the finishes picture

Saturday 12 April 2014

Working with Encaustics in Australia - Safe - Environmentally friendly - Low cost

As it usually is the case, living in Australia (especially in a Country area) you need to be inventive and research a lot as far as buying supplies go. 
Postage is a major cost and lot's USA suppliers do not send to Australia anymore

Once I started painting with Encaustics, I realised the cost for heating the wax needed to be looked at.................
 
This is what I came up with:
 
I am using a Pancake/Crepe griddle/pan, as it provides nearest temperature settings to what the beeswax requires.

Before this I used a Meat griddle, but this provides too much heat and heats up too high at first (providing bad fumes), which is bad news for the Beeswax and also costs more electricity.
 
    I bought this one for under $ 30.00 at Aldi's,
    it has a lot of surface (just over 30 cm wide)
    and works well


Researching heating containers, I came across this:
 
It is a Beauty Shop's Wax warmer,
2 containers, separate heat control,
ideal for my needs,
again, temperature controls for wax and
price around $ 50.00 to 60.00 delivered
 
Added in July: this kind of Beauty Shop's Wax warmer are
NOT RECOMMENDED BY ME, they proved to be cheap and nasty, cable burst into flames.................. when my son took it to pieces afterwards he was shocked at the flimsy construction, told me I was lucky not to be electrocuted, as the wires were badly wired.................


As tools I use:
 
First is an Encaustic iron, around $ 60.00
the second one is a foldable Travel iron.

They can be bought a lot cheaper, but require temperature controls for use with Encaustics


I found that not any Heat gun will do
required are:
heat and air flow control
a model like this one, with a narrow nozzle works best for me
 
I also use a small one from the Scrapbooking range for minor heating


         This is my latest toy, took me forever to be able to buy it in Australia, until I found it in a local Airplane Model makers shop for under $ 40.00


Better even, NO electricity and lots of fun:


Needs a bit getting used to and good ventilation, but I love my Blow torches.
Left the little one for small jobs


Below the real thing:


To paint on I found the best value wood and stability, to be 21mm Playwood.


At the local Hardware store I bought a large sheet for $ 77.00 and had them cut it up to my requirement.

To the lovely people at Bunning's I would like to send a thank you for their patience


Now, how to best and cost effective ground/gesso it, well that proved to be a drama...

First I bought the  R&F Encaustic Gesso, but this proved to be very expensive, then I trialled the traditional Rabbit skin Gesso: NONONO no way........
it worked lovely until I was fusing the beeswax medium, bubbles everywhere, it drove me crazy

so researching alternatives I came across this:

A natural clay paint made by Rockcote. Has the health giving and aesthetic quality of clay in your home. Very environmentally friendly in its manufacture, use and disposal. A good choice for people with high chemical sensitivity and those appreciating the aesthetic quality of natural clay.


I bought it online from here, 4lt Grecian White:

http://www.house-paint.com.au/products/rockcote-clay-paint/109/1

MSDS checks ticked all the boxes

This is what I will be using, cost effective, all natural products and safe